Overview
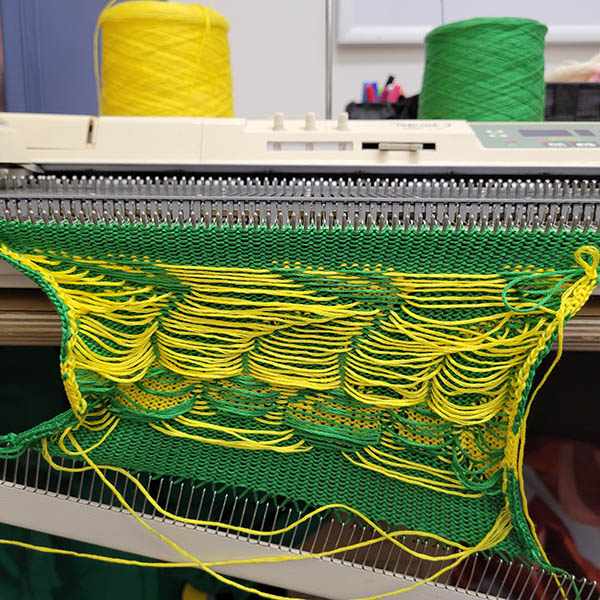
The Brother KH-940 digital knitting machine can be used like a regular knitting machine to create a fabric of stockinette stitch if you don't turn it on. Once you turn it on, you'll have to use the Windows laptop next to it to send it a pattern using the All Yarns Are Beautiful software.
There are multiple different knitting types for this machine (fair isle / multi-colored patterns being only one of them). This tutorial will cover basic setup for casting on, stockinette stitch, and fair isle knitting using a pattern from the computer.
Computer setup
Log into the laptop using your SUNet ID. If you run into the Bitlocker message before you log in, the password is Stanford1234. The AYAB software is available through the Windows Start menu (its icon is black with a yarn logo).
Your pattern
You can email yourself a pattern, or transfer it using a USB drive. The pattern specifications are as follows:
- ONLY black pixels and white pixels (no grayscale, it will knit garbage if there's gray pixels)
- No more than 180 pixels wide at the absolute most (160 is better)
- Wide images should be turned sideways; you can knit infinite rows, but you can't go more than 180 (ideally 160) pixels per row.
Working with AYAB
After you've launched the AYAB software, click the "Load Image File" button in the upper right. Locate your image, or you can use one of the built-in ones. (The folder it defaults to has a subfolder, kh910, that has a lot of built-in patterns, including designs that repeat.)
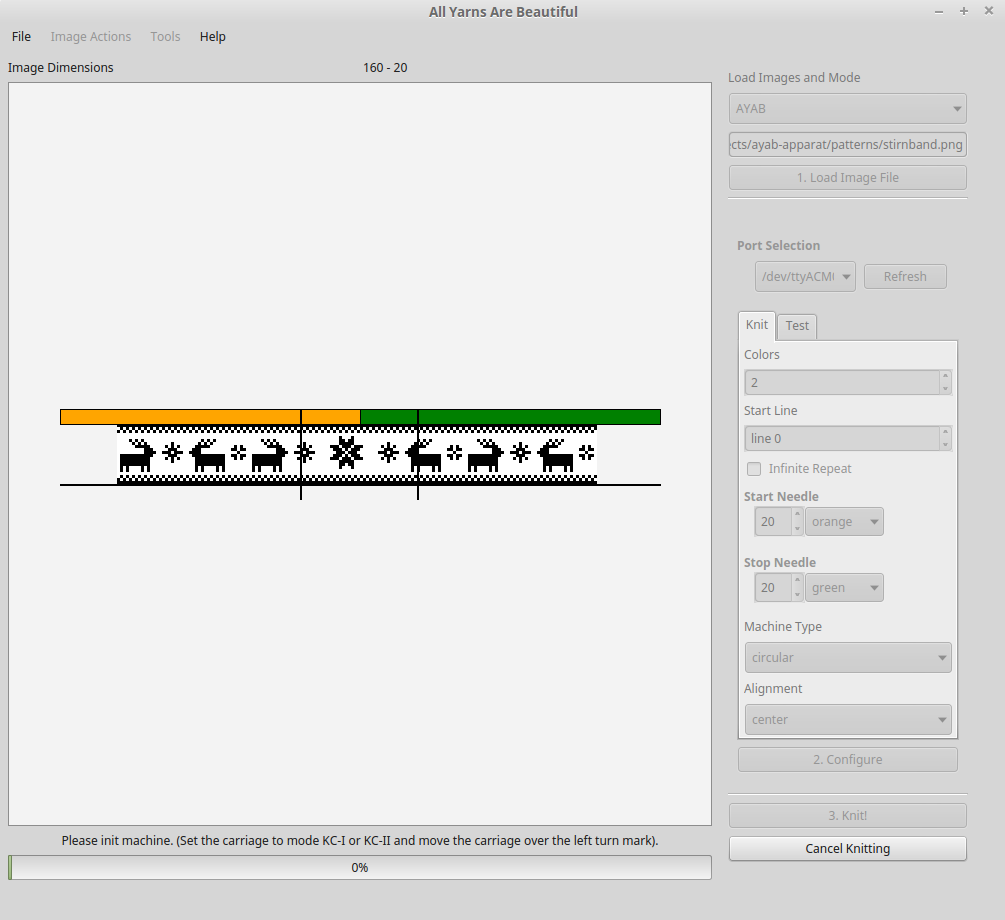
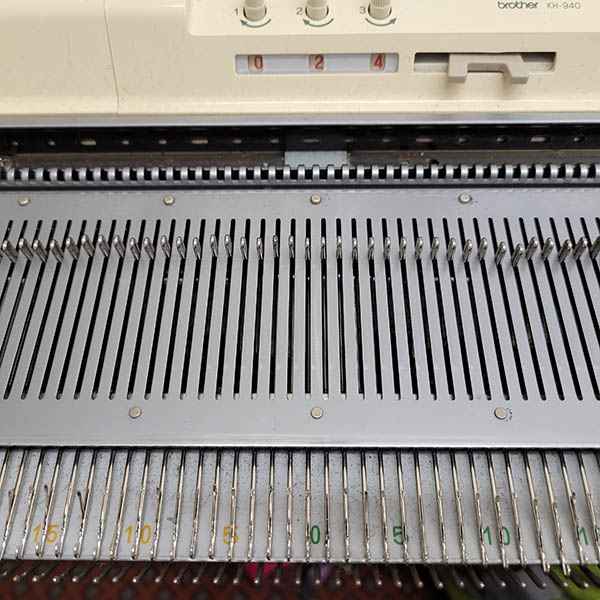
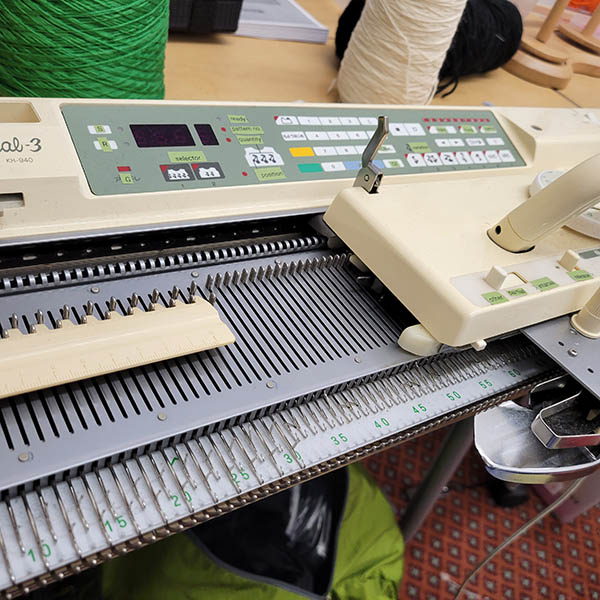
Once you've selected an image, check the "Start Needle" and "Stop Needle" information in the middle of the right column. If you look down at the needle bed, you'll see the left needles are labeled with orange numbers, and the right needles are labeled with green. You'll usually want to set up the knitting so that there's 5-10 more needles than what's listed -- so, if you see the start needle is 20 Orange (as in this screenshot), when you cast on, you'll want to pull down the needles between 30 green and 30 orange.
Now, we'll turn to the knitting machine setup itself, before returning to the laptop and AYAB.
Yarn setup
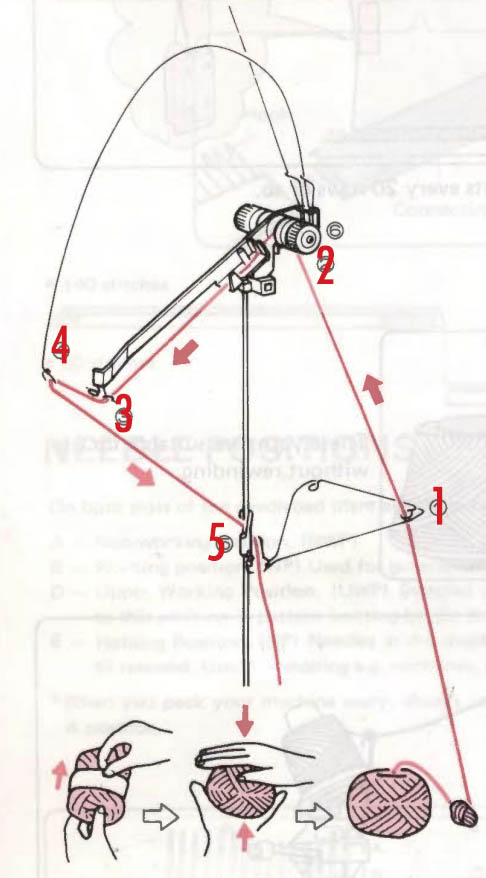
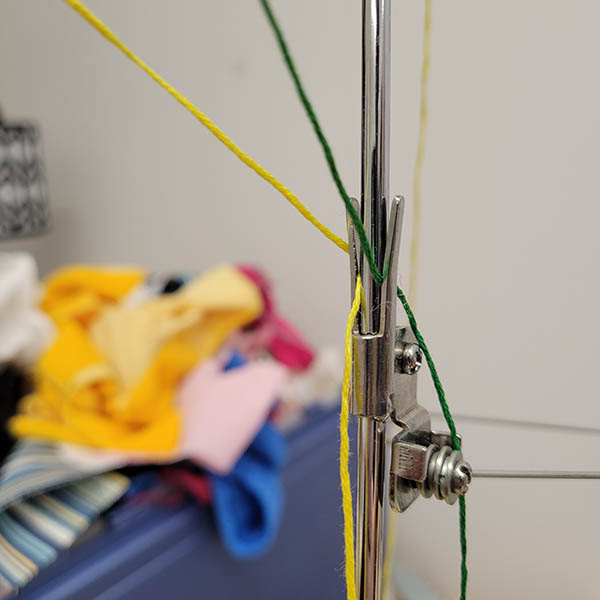
Put the main yarn on the right side of the tensioning unit (the pole contraption attached to the knitting machine). String it through the metal loop low on the pole (1), then to the left of the tension wheel (2), then along the length of the horizontal bar until you put it through the metal loop at the end of the bar (3). From there, pull down the "antenna" on the right and put the yarn through the loop on the end (4). Finally, secure it to the yarn clip until it's time to thread it through the carriage (5).
You can do the same thing for a second yarn on the left, which will be your contrast yarn.
Knitting machine carriage setup
Make sure the knitting machine carriage is slotted onto the rail of the needle bed, and is set up in the following way:
No buttons on the front of the carriage should be pressed
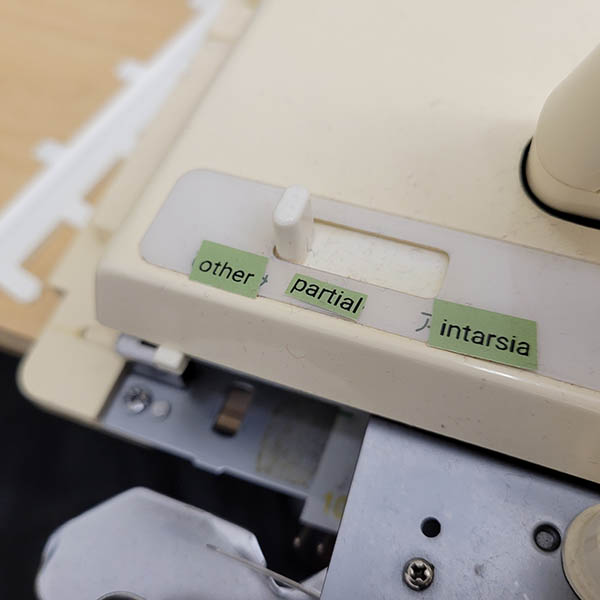
The holding cam lever (switch on the lower left with three settings) should be set to "other"
Both the weaving levers (on the very front of the carriage, which control the brush position) should be set to N
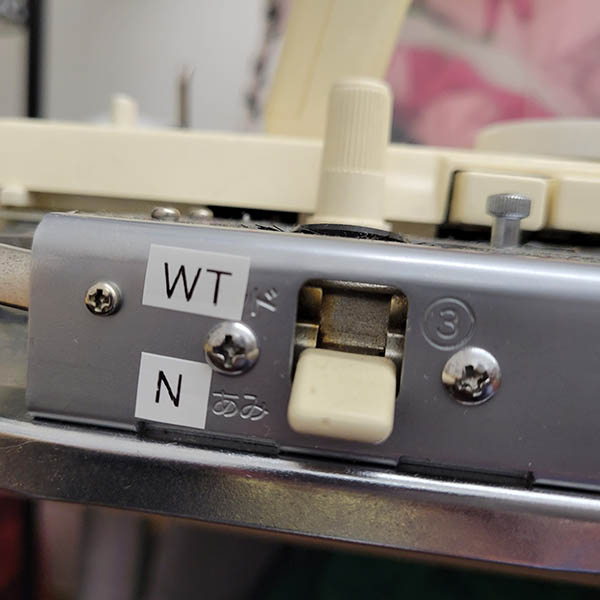
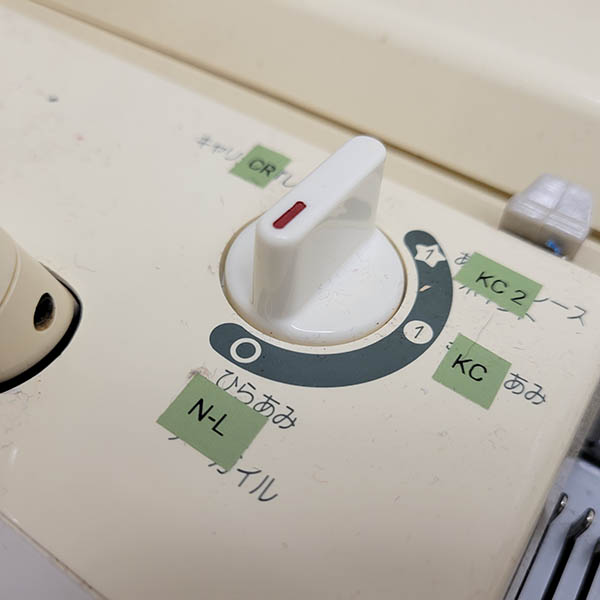
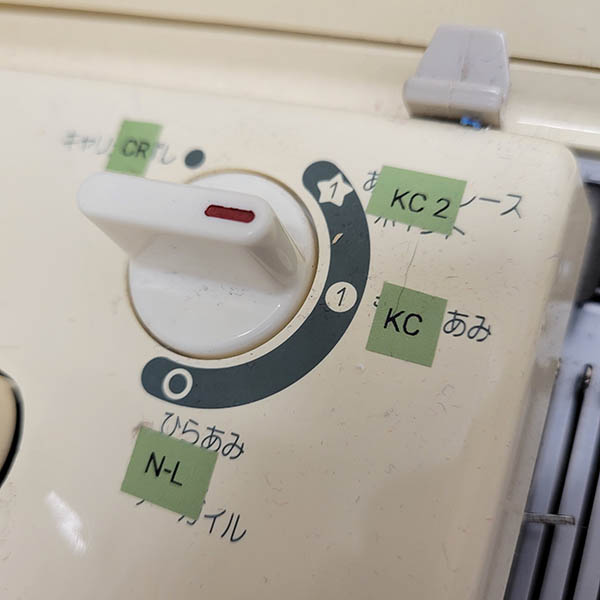
The change nob (dial on the upper right of the carriage) should be set to NL
Casting on
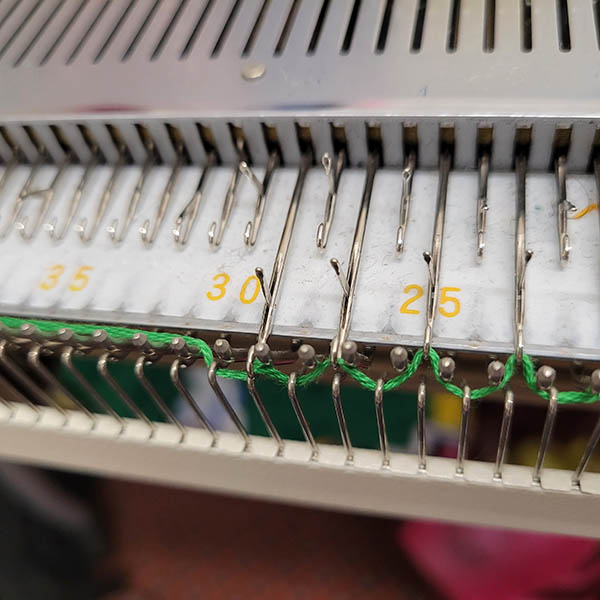
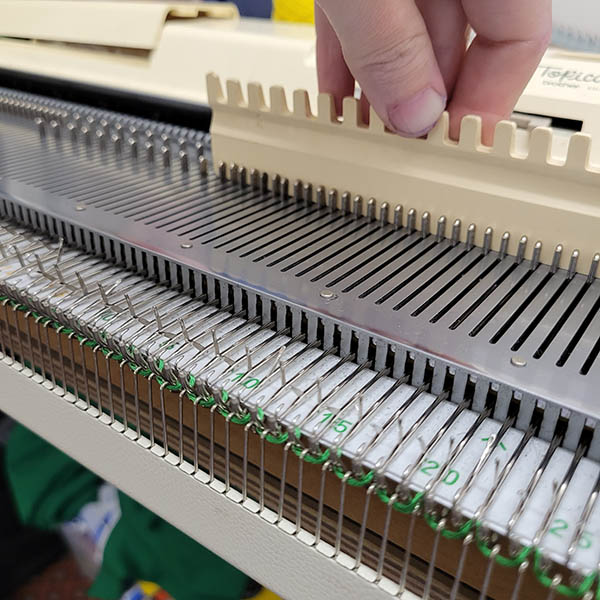
Using the numbered guide at the front of the machine, pull the correct number of needles to position B. (The correct number of needles is 5-10 more than what AYAB shows as the start and stop needles.) Look on either side of the needle bed to see the guide that shows where position B is. If you want to knit a wider piece, you can pull down more needles, but usually you should try to make it even on both sides of the center 0.
Run the carriage across the needles so that it's on the right side of the machine, and all the needles are nicely lined up in position B.
Use the needle pusher to push every other needle back up to position A.
Unhook the main yarn from the clip.
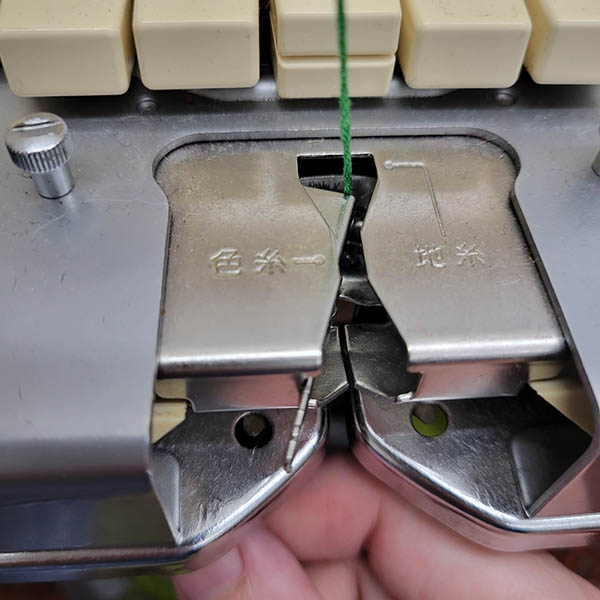
Open the yarn switch on the front of the carriage, and insert the yarn all the way to the back. Hold onto the yarn, and close the yarn switch.

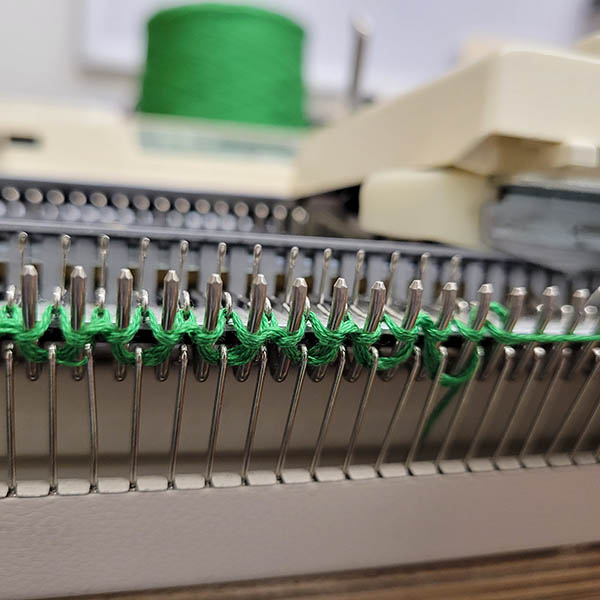
Still holding onto the yarn, move the carriage to the left across the needles. Once the yarn catches on the needles you can let go.
Take the cast-on comb and, with hooks facing the machine, hook the cast-on comb so it's hanging on the loops, but not the extra length of yarn.
Push the needles that you moved up to position A back down to position B.
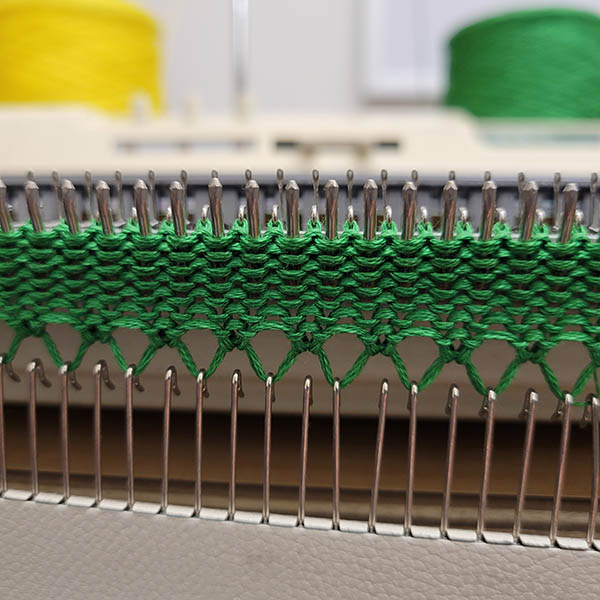
Carefully move the carriage to the right across all the needles to knit the second row.
Continue moving the carriage left and write to knit rows of stockinette stitch. You can just keep doing that indefinitely to knit a sheet of stockinette stitch, or after doing 8-10 rows, you can turn on the machine to set it up for knitting a design.
Knitting a pattern
Follow the setup steps above before getting started. Be sure you've cast on and have knitted several rows as described above.
Carriage setup
Make sure the carriage is moved all the way over to the left, onto the rail and off the machine itself.
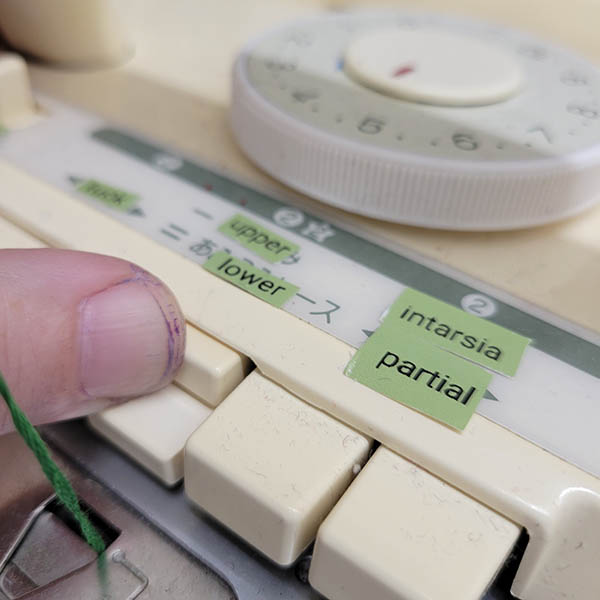
Change the change nob dial on the upper right of the carriage from N-L (which we used for stockinette) to KC.
Push in only the top center button on the carriage.
Computer setup
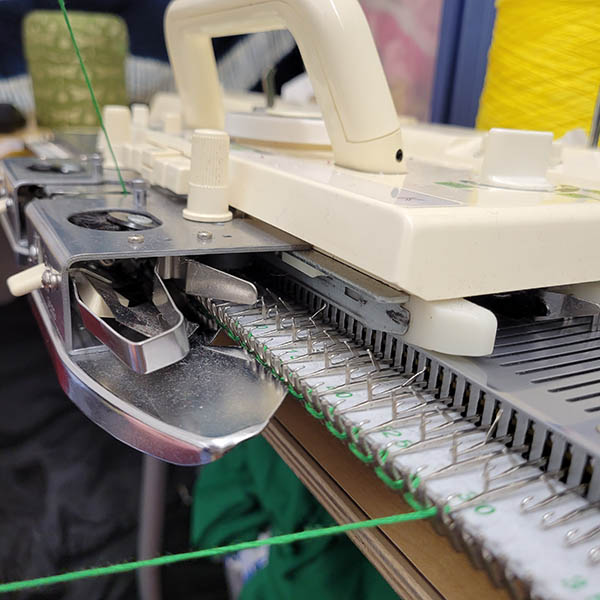
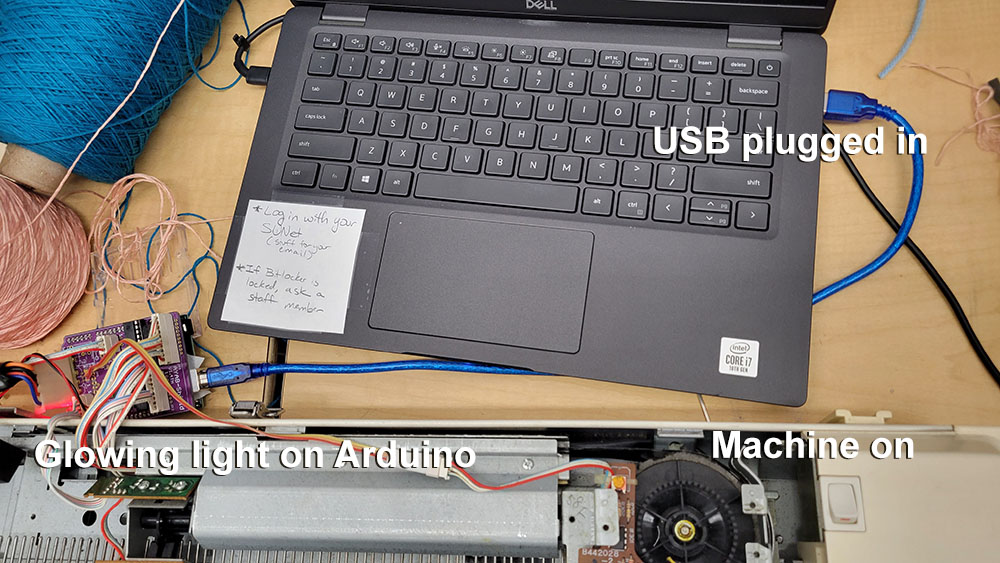
Going back to the computer, make sure the blue USB cord from the Arduino is plugged into the computer, and the knitting machine itself is turned on. The Arduino board should be glowing red, and you should see a small red line on the power switch for the machine, as in this image:
In the AYAB software, click the 2. Configure button, then the 3. Knit button. Move the carriage to the right, past the turn knob and you'll hear the machine beep once, then twice. Move the carriage all the way to the right, past the needles that you've pulled down, and the machine should beep again.
Make sure your second color is correctly threaded through the machine before you move the carriage to the left; the machine knits the main color on the rightward passes, and the second color on the leftward passes. The machine will beep every time you've completed the pattern for that row, but you may need to go a little bit further to clear the additional buffer stitches you've set up on either side before you switch directions.