NOTE: This tutorial is out of date for the Textile Makerspace, because we've replaced the machine's built-in program with an Arduino that connects to All Yarns are Beautiful. We're keeping this version up for others to use with an un-hacked machine.
Overview
The Brother KH-940 digital knitting machine can be used like a regular knitting machine to create a fabric of stockinette stitch if you don't turn it on. Once you turn it on, you'll have to interact with the machine's program interface to specify what pattern to knit.
There are multiple different knitting types for this machine (fair isle / multi-colored patterns being only one of them), as well as many ways you can manipulate the built-in patterns. This tutorial will cover basic setup for casting on, stockinette stitch, and fair isle knitting with a built-in pattern.
Yarn setup
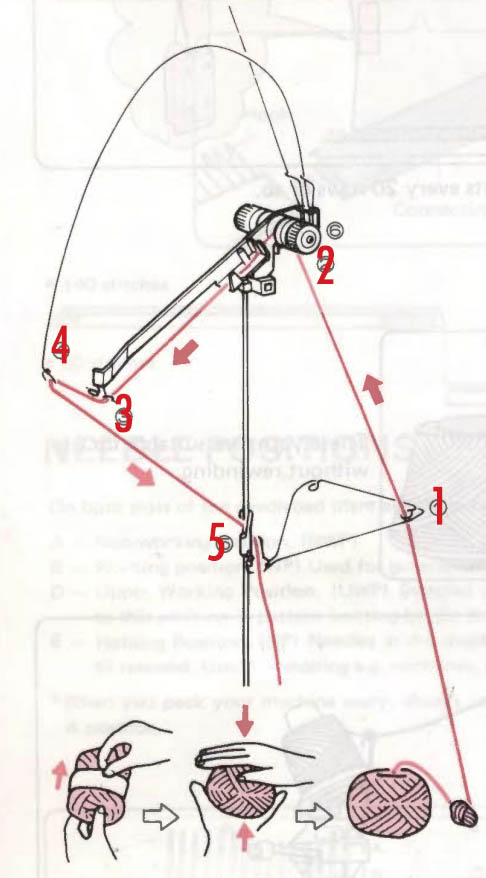
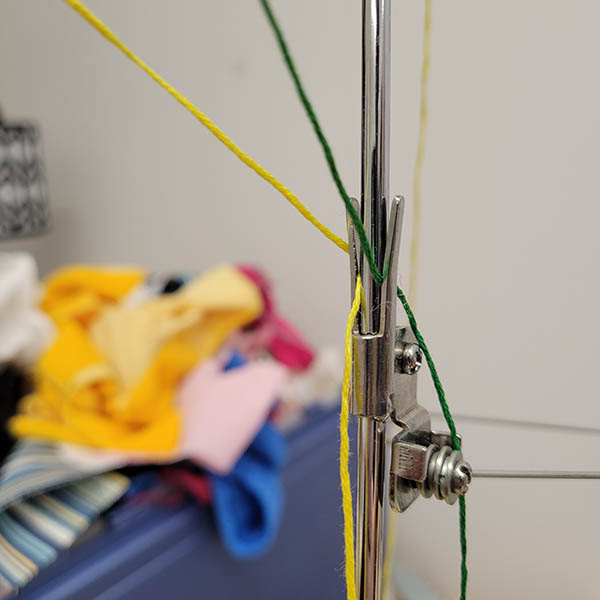
Put the main yarn on the right side of the tensioning unit (the pole contraption attached to the knitting machine). String it through the metal loop low on the pole (1), then to the left of the tension wheel (2), then along the length of the horizontal bar until you put it through the metal loop at the end of the bar (3). From there, pull down the "antenna" on the right and put the yarn through the loop on the end (4). Finally, secure it to the yarn clip until it's time to thread it through the carriage (5).
You can do the same thing for a second yarn on the left, which will be your contrast yarn.
Knitting machine carriage setup
Make sure the knitting machine carriage is slotted onto the rail of the needle bed, and is set up in the following way:
No buttons on the front of the carriage should be pressed
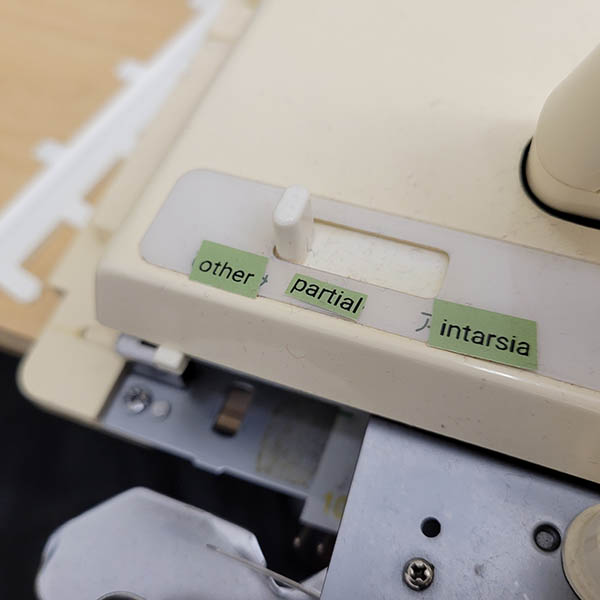
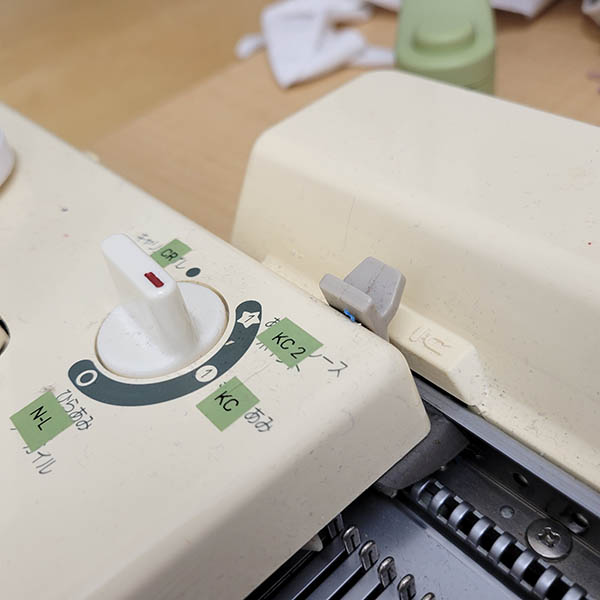
The holding cam lever (switch on the lower left with three settings) should be set to "other"
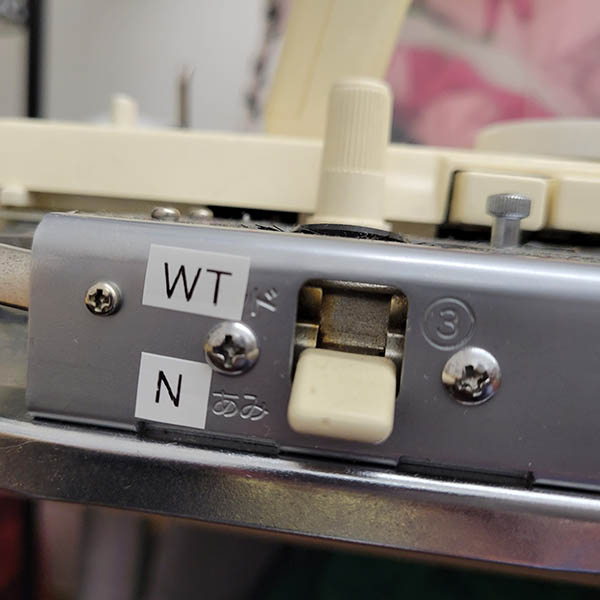
Both the weaving levers (on the very front of the carriage, which control the brush position) should be set to N
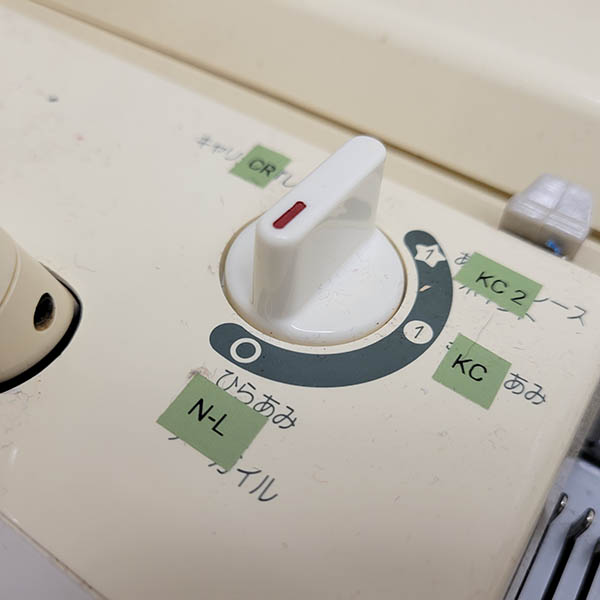
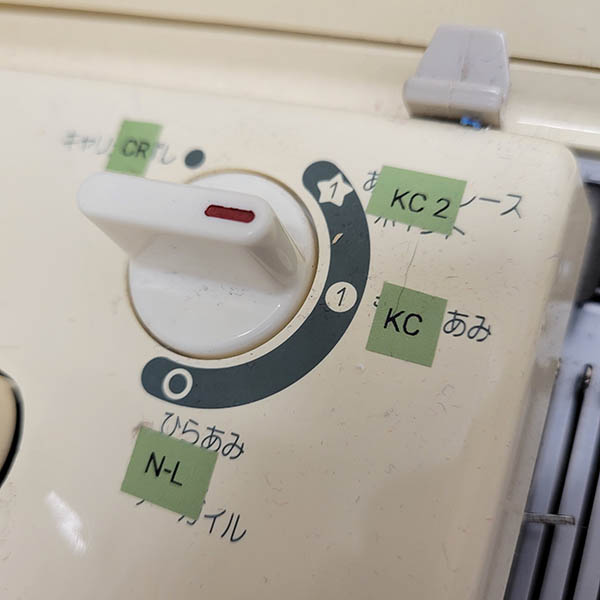
The change nob (dial on the upper right of the carriage) should be set to NL
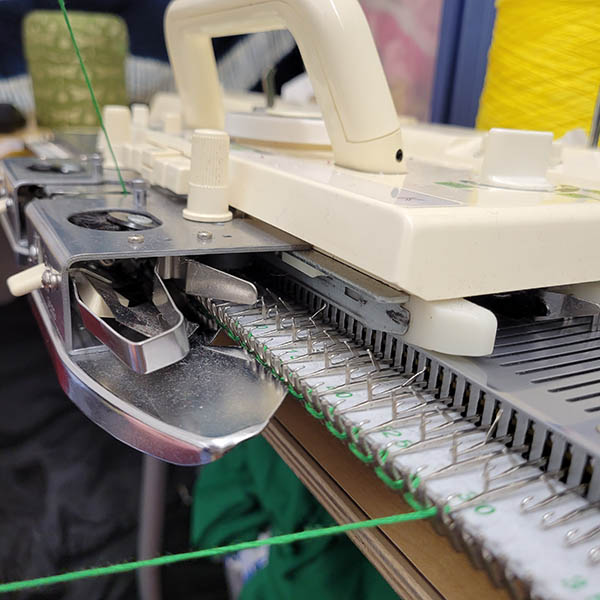
Casting on
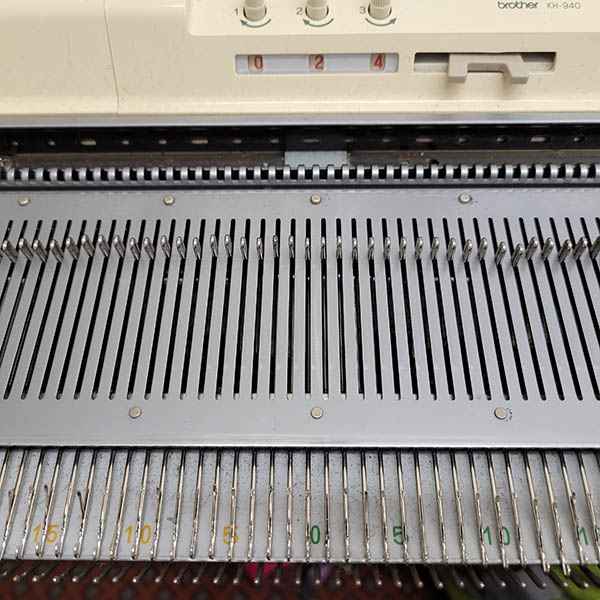
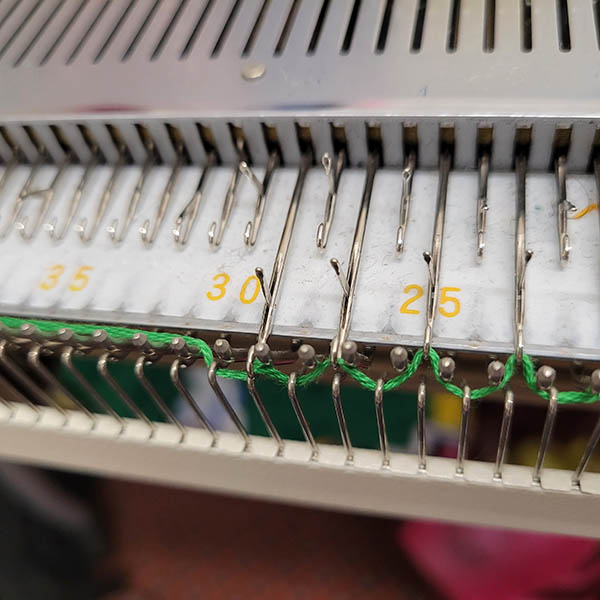
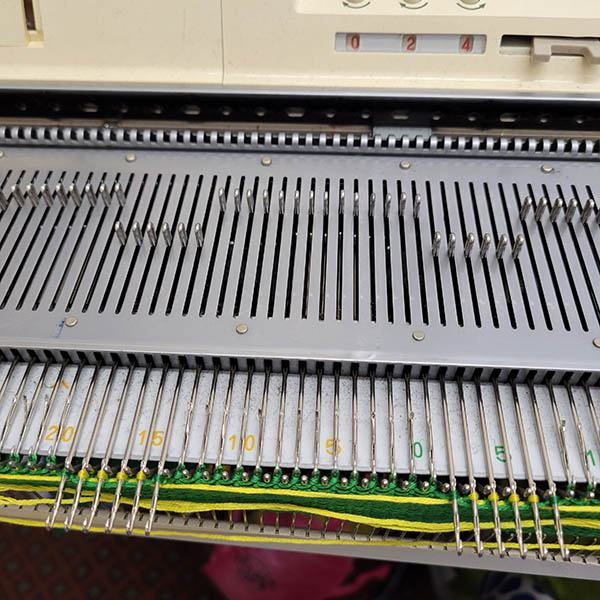
Using the numbered guide at the front of the machine, pull 60 needles (30 on each side of the center 0) to position B. Look on either side of the needle bed to see the guide that shows where position B is. If you want to knit a wider piece, you can pull down more needles, but usually you should try to make it even on both sides of the center 0.
Run the carriage across the needles so that it's on the right side of the machine, and all the needles are nicely lined up in position B.
Use the needle pusher to push every other needle back up to position A.
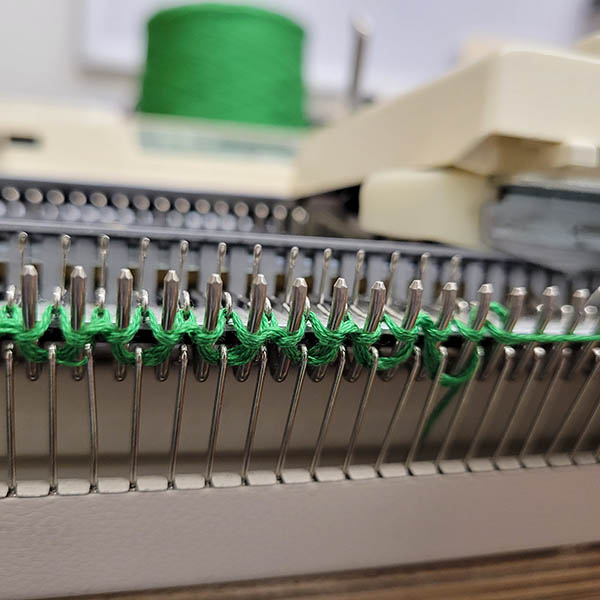
Unhook the main yarn from the clip.
Open the yarn switch on the front of the carriage, and insert the yarn all the way to the back. Hold onto the yarn, and close the yarn switch.
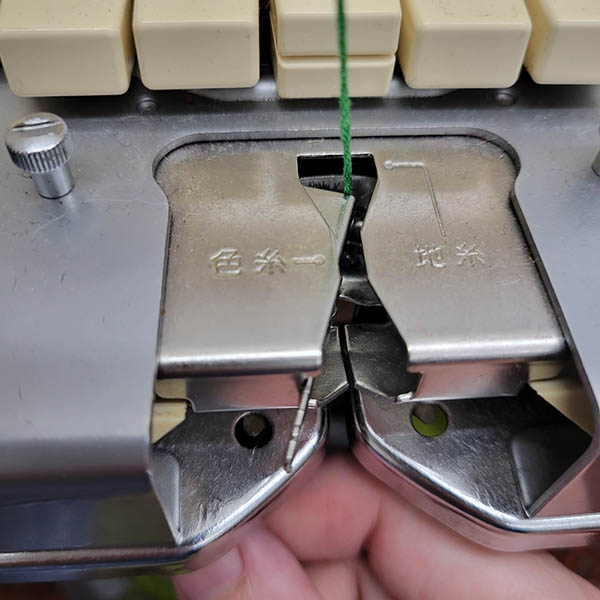

Still holding onto the yarn, move the carriage to the left across the needles. Once the yarn catches on the needles you can let go.
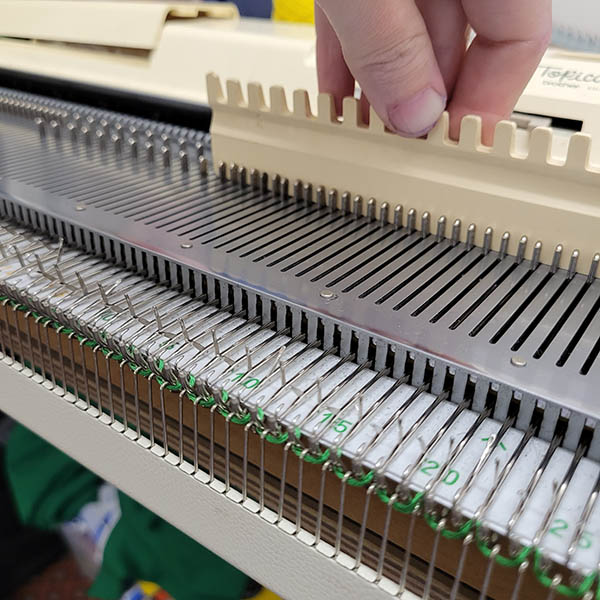
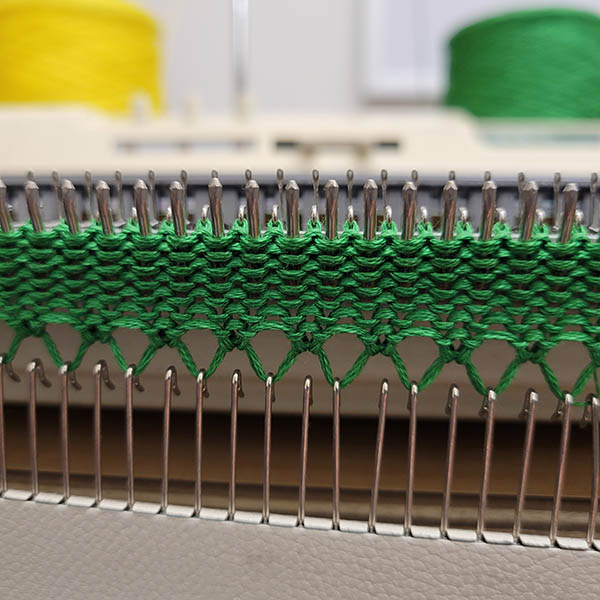
Take the cast-on comb and, with hooks facing the machine, hook the cast-on comb so it's hanging on the loops, but not the extra length of yarn.
Push the needles that you moved up to position A back down to position B.
Carefully move the carriage to the right across all the needles to knit the second row.
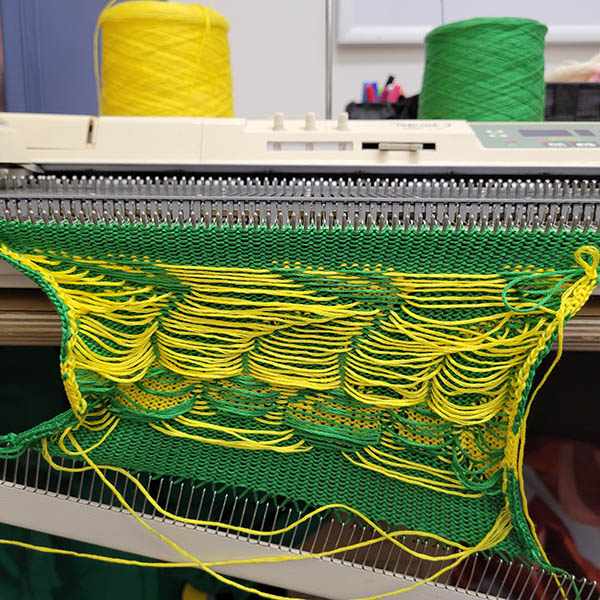
Continue moving the carriage left and write to knit rows of stockinette stitch. You can just keep doing that indefinitely to knit a sheet of stockinette stitch, or after doing 8-10 rows, you can turn on the machine to set it up for knitting a design.
Knitting a pattern
Follow the setup steps above before getting started. Be sure you've cast on and have knitted several rows as described above.
Carriage setup
Change the change nob dial on the upper right of the carriage from N-L (which we used for stockinette) to KC.
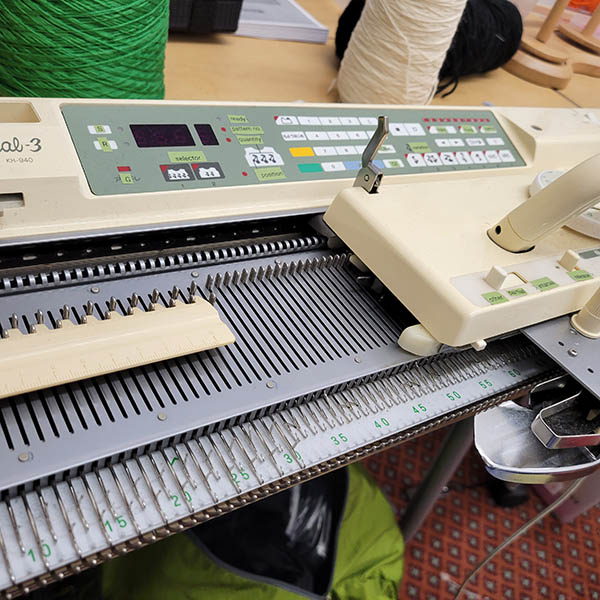
Push in only the top center button on the carriage.
Pattern setup
Turn on the machine. By default it will retain the information from the last time someone was knitting a pattern, so the green ready light will be on, you'll see some number (corresponding to the number of rows the last person knit), and a display with a second number (representing the contrast yarn color from the last pattern used).
Hit the step button (the long blue one) so that the red light is on "pattern number".
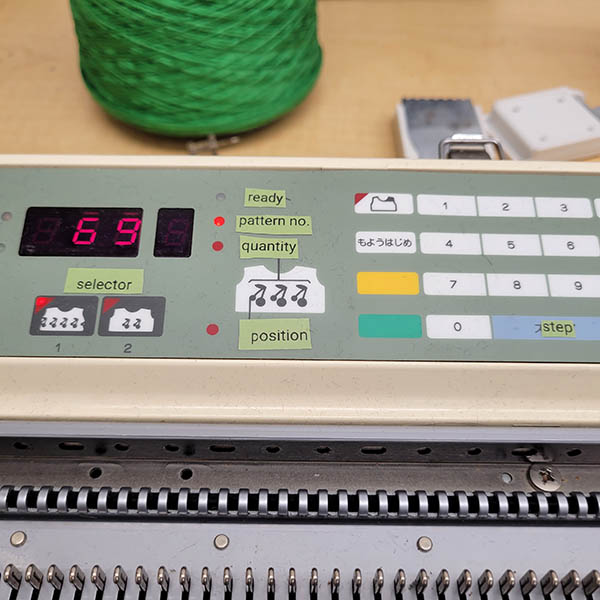
Hit the CE button to clear it, and use the keypad to type in the number for the pattern you want to use. (Check the colorful book of patterns for all the pattern options.)
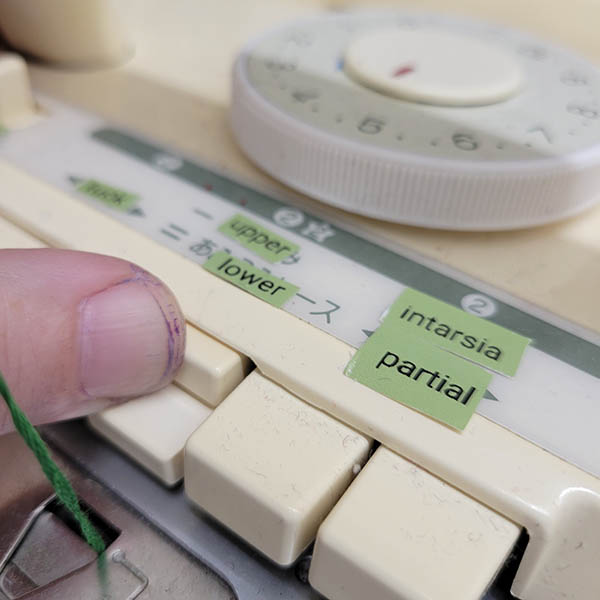
Hit the step button again to set the position of the repeats (if you have the "selector" set to 1, which lets you skip the number of repeats because it'll just repeat across the whole width of your knitting). You can hit the yellow (left side) and green (right side) buttons to change the offset, or just leave it with the defaults. In the image below, the position is offset on the yellow (left) side (because the yellow light is lit up) by 13 spaces.
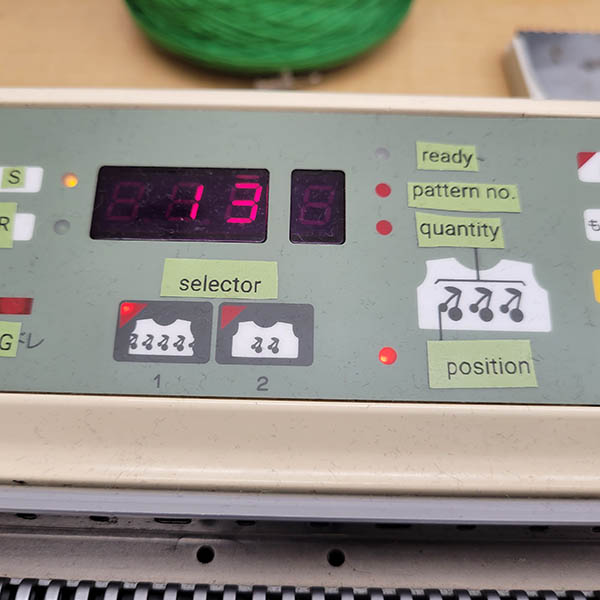
Hit the step button to take you back to having a green light at "ready", then hit the "start" button. You should see it set to row 1 in the first display, and some other number in the second display, corresponding to which color contrast yarn you should be using. Many of these patterns use multiple colors of contrast yarn; if you want to knit it all in just one contrast color, you can ignore it.
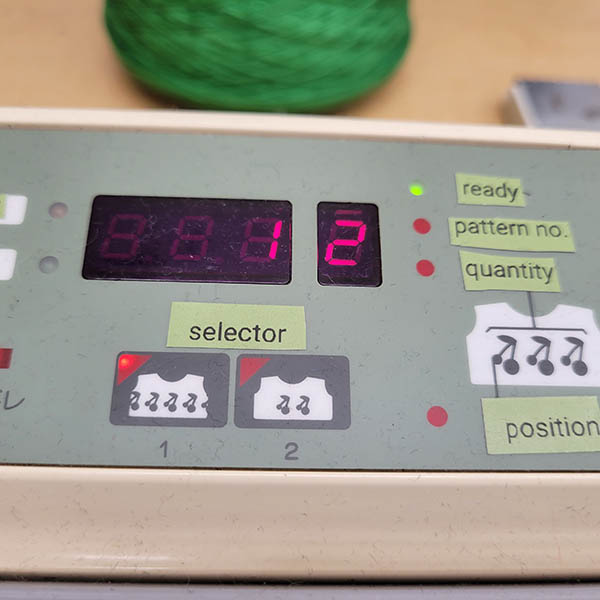
Move the carriage slowly all the way to the left past the arrow mark, but don't let it fall off the needle bed altogether! Then, move the carriage to the right past the needles, and back again. After each pass, there should be a blinking number on the display that increases to show the number of rows you've knit.
Keep moving the carriage back and forth slowly across the needles, and if everything is working, different needles will pop out each time for that row.
When the pattern is complete, the machine will beep. At that point, you can redo the pattern setup to get it to knit more patterns, or you can remove the second yarn from the carriage, change the carriage settings back to stockinette, then knit several more rows.